Dot Cakes
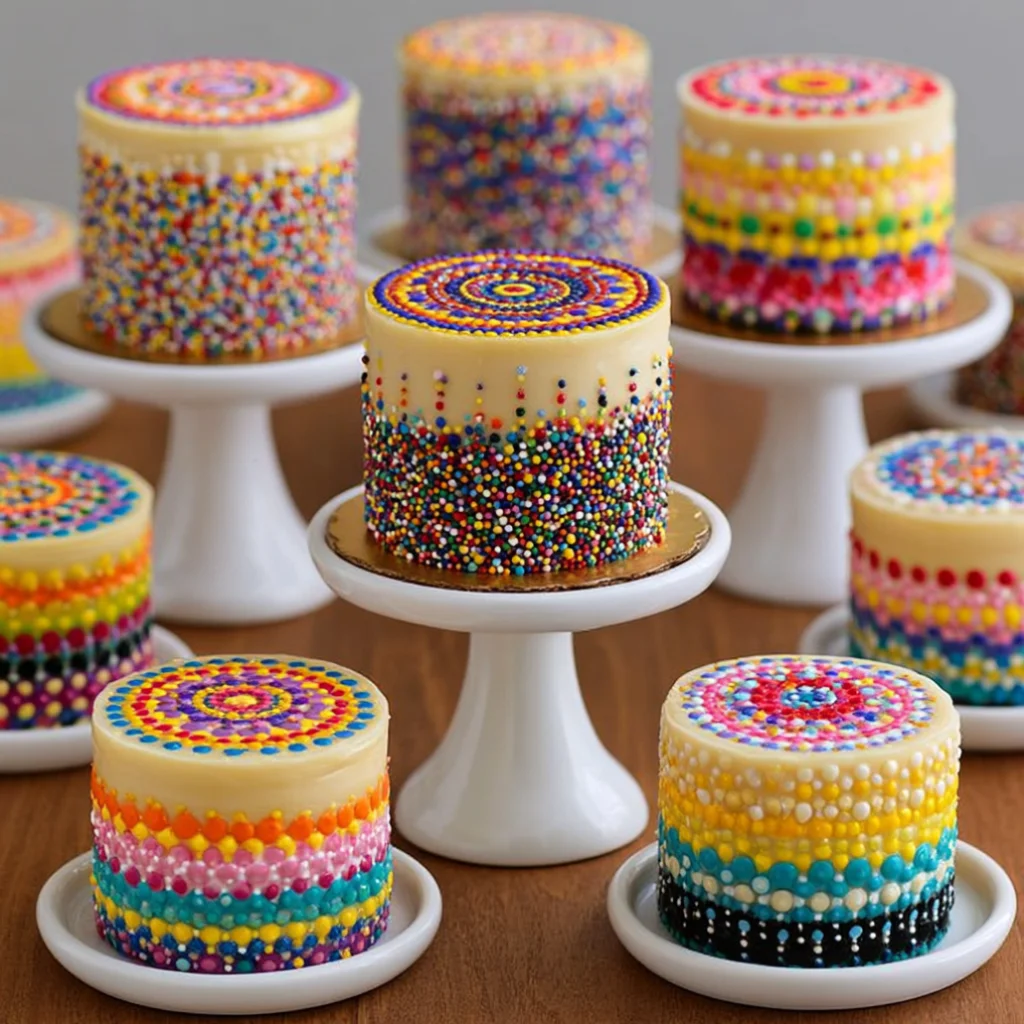
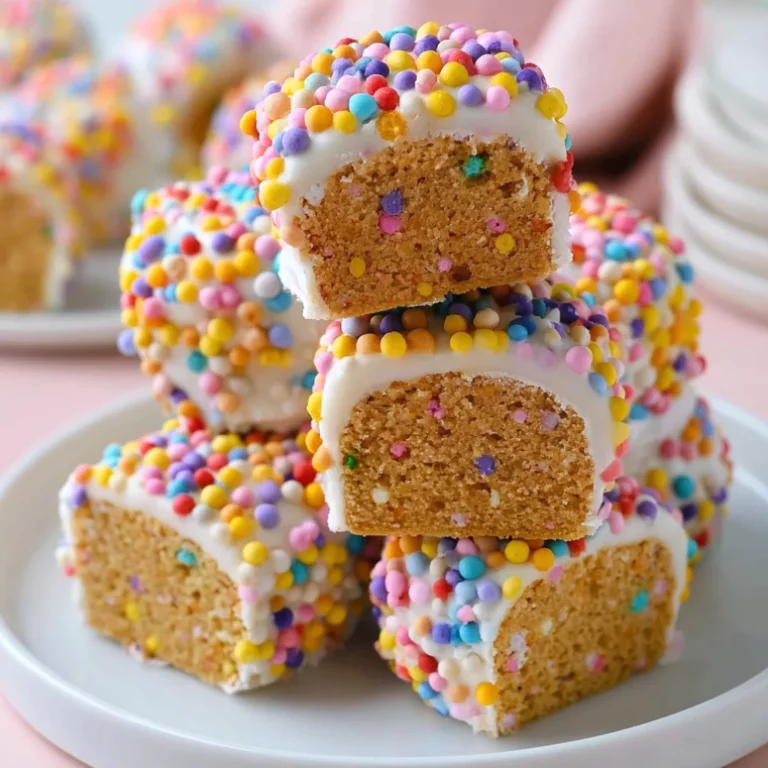
Delightful and versatile, Dot Cakes are mini cakes that can add a splash of color and flavor to any occasion. Their charming dot design can be adorned with an array of decorations, making them perfect for birthday parties, festive gatherings, or simply as a cozy dessert for family. This article explores a delicious vanilla dot cake recipe, complete with tips for decoration and serving, as well as variations to fit any dietary preference. These mini treats are not just a feast for the eyes; they are also incredibly fun to make and can be tailored to suit any celebration or mood. The vibrant colors and delightful flavors make Dot Cakes an ideal choice for both kids and adults alike, creating memorable moments during every bite.
Ingredients
- Dry Ingredients:
- 1 ½ cups all-purpose flour – For the best texture, sift the flour before measuring to remove any lumps and aerate it, ensuring a light and fluffy cake.
- 1 cup granulated sugar – This adds sweetness; you may adjust to taste, or substitute with coconut sugar for a lower glycemic option that offers a caramel-like flavor.
- 2 tsp baking powder – Ensure it’s fresh for the best rise and fluffiness; check the expiration date to avoid flat cakes.
- ½ tsp salt – Enhances the flavor; use fine sea salt for more even distribution throughout the batter.
- Wet Ingredients:
- ½ cup unsalted butter, softened – Use high-quality butter for a richer, creamier taste; avoid margarine for the best results.
- 2 large eggs – Choose organic or free-range eggs for superior flavor and quality; they contribute to the cake’s moisture.
- 1 tsp vanilla extract – Pure vanilla extract will provide a deeper flavor compared to imitation vanilla; consider using homemade extract for an even more pronounced taste.
- ¾ cup milk – Whole milk adds richness; you can also use buttermilk for added tenderness and a slight tang that complements the sweetness.
- Toppings:
- Buttercream frosting (recipe below) – A classic choice that can be flavored or colored as desired for a vibrant touch; consider using gel food coloring for more intense shades.
- Colored sprinkles or edible glitter – These not only add color but also fun; choose nonpareils or jimmies for different effects, and try to match colors to your theme.
- Fresh fruit or chocolate chips (optional) – Berries, sliced bananas, or mini chocolate chips can enhance both flavor and texture, adding a delightful surprise to each bite.
Steps / Instructions
- Preheat the oven: Preheat your oven to 350°F (175°C). Prepare a mini cake pan by greasing it lightly or lining it with parchment paper to prevent sticking, ensuring easy release after baking. This step is crucial to avoid any frustration during the unmolding process.
- Mix dry ingredients: In a medium bowl, whisk together the flour, sugar, baking powder, and salt until well combined. This helps to aerate the mixture, ensuring a fluffy cake, and prevents clumping of the baking powder and salt.
- Combine wet ingredients: In a large mixing bowl, beat the softened butter until creamy, which should take about 2-3 minutes. Add the eggs one at a time, mixing well after each addition to ensure they are fully incorporated. Stir in the vanilla extract, which should fragrant and deeply aromatic, enhancing the overall flavor of the Dot Cakes.
- Add dry ingredients: Gradually incorporate the dry mixture into the wet ingredients, alternating with the milk. Begin and end with the flour mixture to maintain an even consistency. Mix until just combined; do not overmix. You should see a few lumps, which is perfect to ensure a light cake that rises beautifully in the oven.
- Pour batter into pans: Divide the batter equally into the mini cake pan, filling each mold about two-thirds full to allow for rising. Use a spatula to smooth the tops for an even bake, ensuring that all cakes rise uniformly.
- Bake: Bake in the preheated oven for 15-20 minutes, or until a toothpick inserted in the center comes out clean. The cakes should be golden brown on top and spring back when lightly touched, indicating they are baked through.
- Cool: Allow the cakes to cool in the pan for about 10 minutes before transferring them to a wire rack to cool completely. This cooling process is essential to set the structure of the mini cakes and prevents them from becoming soggy.
- Decorate: Once cooled, use buttercream frosting to top each mini cake. Create fun dot designs using a piping bag and decorate with sprinkles, fruit, or chocolate chips as desired. Feel free to mix colors in your frosting for a vibrant visual appeal that will impress your guests.
Tips & Tricks
To achieve the best results with your Dot Cakes, consider the following tips: You can learn more about this topic. Each of these tips can elevate your baking experience and ensure that your cakes come out perfectly every time, transforming a simple recipe into a standout dessert.
- Ingredient quality: Use high-quality butter and fresh eggs for a richer flavor that truly shines through in your Dot Cakes. Ingredients at room temperature integrate better, yielding a smoother batter that helps achieve a consistent texture.
- Make-ahead: These cakes can be baked in advance and stored in an airtight container for up to three days. Frost them just before serving for the best texture. Consider freezing unfrosted cakes for longer storage; just wrap them well in plastic wrap to prevent freezer burn.
- Common mistakes: Avoid overmixing the batter, as this can lead to dense cakes. Always measure ingredients accurately for consistent results; using a kitchen scale can take guesswork out of your baking routine and enhance precision.
- Storage: Store any leftover cakes in the refrigerator to maintain freshness, especially if topped with buttercream frosting. For longer shelf-life, wrap individual cakes in plastic wrap and place them in an airtight container; this also makes them easier to grab on the go!
Variations
Dot Cakes can be customized in various ways to suit your taste and dietary needs: Check out our related guide for more tips. These variations not only enhance the flavor but also allow you to cater to different dietary preferences or seasonal ingredients, making your baking experience more enjoyable and diverse.
- Gluten-free dot cakes: Substitute all-purpose flour with a gluten-free blend to make these cakes gluten-free. Be sure to choose a blend that includes xanthan gum for better texture, ensuring they are just as enjoyable as traditional versions.
- Fruit-flavored dot cakes: Add mashed bananas, pureed strawberries, or lemon zest to the batter for a fruity twist. Fresh fruits can also be folded in for added texture and flavor, creating an exciting surprise in each cake.
- Chocolate dot cake variations: Replace ¼ cup of flour with unsweetened cocoa powder for rich chocolate dot cakes. Adjust the sugar slightly to balance out the bitterness of the cocoa, ensuring the sweetness remains pleasing.
- Vegan option: Use plant-based butter, almond milk, and flax eggs as a substitute for eggs to create a vegan dot cake. This makes the recipe accessible to those following a vegan lifestyle without sacrificing taste, keeping the flavor profile robust.
- Seasonal flavors: Experiment with spices like cinnamon or nutmeg for seasonal variations, especially during fall or winter. Consider adding pumpkin puree for a moist and flavorful autumn treat, perfect for cozy gatherings.
Dot Cakes
Delightful and versatile mini cakes that can add a splash of color and flavor to any occasion. Their charming dot design can be adorned with an array of decorations, making them perfect for birthday parties, festive gatherings, or simply as a cozy dessert for family.
Ingredients
- 1 ½ cups all-purpose flour
- 1 cup granulated sugar
- 2 tsp baking powder
- ½ tsp salt
- ½ cup unsalted butter, softened
- 2 large eggs
- 1 tsp vanilla extract
- ¾ cup milk
- Buttercream frosting
- Colored sprinkles or edible glitter
- Fresh fruit or chocolate chips (optional)
Directions
Preheat your oven to 350°F (175°C). Prepare a mini cake pan by greasing it lightly or lining it with parchment paper.
In a medium bowl, whisk together the flour, sugar, baking powder, and salt until well combined.
In a large mixing bowl, beat the softened butter until creamy. Add the eggs one at a time, mixing well after each addition, and stir in the vanilla extract.
Gradually incorporate the dry mixture into the wet ingredients, alternating with the milk. Mix until just combined; do not overmix.
Divide the batter equally into the mini cake pan, filling each mold about two-thirds full.
Bake in the preheated oven for 15-20 minutes, or until a toothpick inserted in the center comes out clean.
Allow the cakes to cool in the pan for about 10 minutes before transferring them to a wire rack to cool completely.
Once cooled, use buttercream frosting to top each mini cake.
Nutrition Facts
Recipe Reviews
- ★★★★★
Excellent recipe!
Leave a Reply
Your email address will not be published. Required fields are marked *





Excellent recipe!