Magic Buns
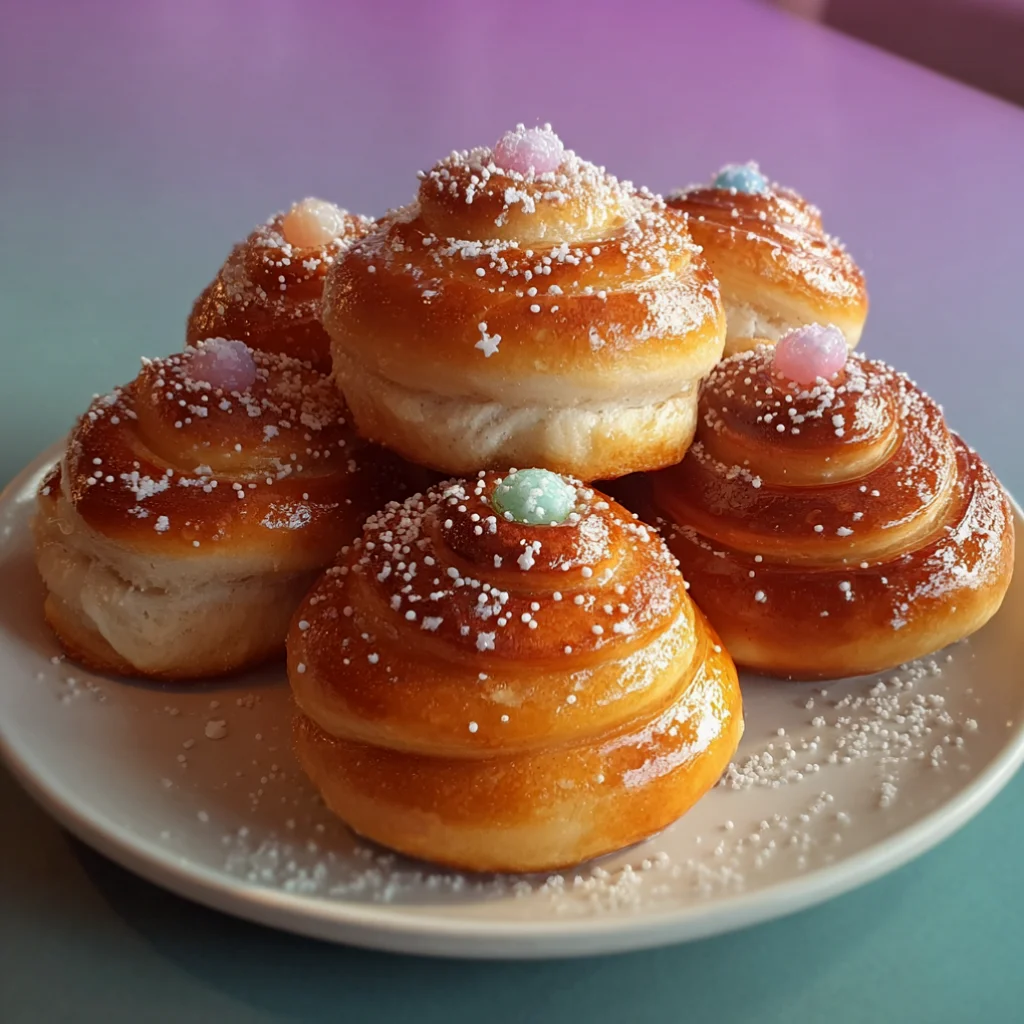
Magic Buns are the epitome of comfort food, enveloping you in their pillowy softness and inviting aromas. These delightful homemade buns can be adapted for any meal, whether as fluffy dinner rolls, sweet breakfast treats, or savory stuffed options. With their buttery, tender texture, they make for an irresistible addition to your baking repertoire. Not only do they taste incredible, but the aroma while baking fills your kitchen with an inviting warmth that makes everyone feel at home. These buns are perfect for family gatherings, holiday dinners, or any occasion requiring a little extra comfort. Their versatility allows you to enjoy them at breakfast, lunch, or dinner, making them a truly magical addition to your meal planning.
Ingredients
- Dry Ingredients:
- 4 cups all-purpose flour, preferably sifted to enhance texture, ensuring a lighter, airier bun.
- 1/4 cup granulated sugar, which adds a subtle sweetness to balance the flavors.
- 1 packet (2 1/4 teaspoons) active dry yeast, fresh for optimal rise; check the expiration date for best results.
- 1 teaspoon salt, which heightens the flavor of the buns and enhances the overall taste experience.
- Wet Ingredients:
- 1 cup whole milk, warmed (about 110°F), providing richness and moisture that leads to a tender crumb.
- 1/2 cup unsalted butter, melted, contributing to the buns’ tender texture and rich flavor.
- 2 large eggs, which help bind the ingredients and add richness, resulting in a more flavorful bun.
- Optional Toppings:
- 1 egg, beaten (for egg wash), giving the buns a beautiful golden finish that is appealing.
- Sesame seeds or poppy seeds (for garnish), adding texture and visual appeal, making them look as delicious as they taste.
Note: For a dairy-free version, simply substitute the milk with almond or oat milk, and use coconut oil instead of butter for a similar richness. Adjust the sugar content as needed for savory variations. You can learn more about this topic, including other ingredient substitutions and their impacts on flavor and texture, to tailor your Magic Buns to your liking.
Steps / Instructions
- In a large mixing bowl, combine the warm milk and sugar. Sprinkle the yeast over the top and let it sit for about 5-10 minutes, until foamy. This step activates the yeast and is crucial for the dough’s rise, ensuring your buns will be light and fluffy.
- Add the melted butter and eggs to the yeast mixture. Stir until well combined, ensuring the mixture is well-blended before proceeding to help incorporate all flavors evenly.
- In a separate bowl, whisk together the flour and salt. Gradually add the dry ingredients to the wet mixture, stirring until a soft dough forms. The dough should come together but may still be slightly sticky, indicating the right texture.
- Transfer the dough to a floured surface. Knead for about 8-10 minutes until the dough is smooth and elastic. This step is crucial for developing the gluten, which gives the buns their fluffy texture. You can tell the dough is ready when it springs back after being pressed with a finger; this elasticity ensures optimal rise.
- Shape the dough into a ball and place it in a greased bowl. Cover with a clean kitchen towel and let it rise in a warm place for about 1 to 1.5 hours, or until doubled in size. Ensure the bowl is kept in a draft-free area for optimal rising, as temperature fluctuations can hinder fermentation.
- Once risen, punch down the dough gently to release the excess air. Turn it out onto a floured surface. Divide the dough into 12 equal pieces for large buns or 24 pieces for smaller rolls. Use a bench scraper for ease and precision in cutting.
- Shape each piece into a smooth ball by tucking the edges underneath, ensuring a uniform shape. Place the balls on a greased baking sheet, spaced evenly apart to allow room for rising and baking.
- Cover the shaped buns with the towel again and let them rise for another 30-45 minutes until puffy. This second rise helps develop a lighter texture, essential for achieving that perfect softness.
- Preheat your oven to 375°F (190°C) during the last 15 minutes of the rising time to ensure even baking and that the buns will have a perfect crust.
- If desired, brush the tops of the buns with the beaten egg and sprinkle with sesame or poppy seeds. This adds a beautiful sheen and enhances the flavor, making them even more irresistible.
- Bake in the preheated oven for 15-20 minutes, until golden brown and the buns sound hollow when tapped on the bottom. Keep an eye on them toward the end of baking to avoid over-browning; the aroma will guide you!
- Remove from the oven and let cool on a wire rack. Enjoy warm or at room temperature, and consider serving with butter, honey, or your favorite jam for an extra indulgent experience, turning your Magic Buns into a delightful treat.
Tips & Tricks
For the best results with your Magic Buns, consider these tips: Check out our related guide for more tips on perfecting your baking skills and enhancing flavor. Practice and patience are key!
- Temperature Matters: Ensure your milk is warm but not hot; too high a temperature can kill the yeast. A range of 100°F to 110°F is ideal for activating the yeast without compromising its effectiveness, giving your buns a better rise.
- Kneading Technique: When kneading by hand, use the heel of your hand to push the dough away and fold it back over itself. This motion helps develop gluten effectively, which is vital for achieving the light, airy texture characteristic of Magic Buns.
- Make-Ahead Option: Prepare the dough the night before, let it rise in the fridge overnight, and shape it into buns in the morning. Let them rise while your oven preheats, allowing for a fresh batch without the early morning rush and stress.
- Storage: Keep leftover buns in an airtight container at room temperature for up to 3 days to maintain their softness. Alternatively, freeze for up to 2 months. Reheat in a warm oven for a few minutes before serving to restore their fresh-baked quality and delightful aroma.
- Avoiding Mistakes: If your dough isn’t rising, check the freshness of your yeast. Always store it in a cool, dry place, and consider testing it with a small batch to ensure it’s active before beginning, as this will save you from potential frustrations.
Variations
Magic Buns can be tailored to suit any taste or dietary need. Here are some creative variations to consider:
- Sweet Dough Variations: Add vanilla extract or orange zest to the dough for a fragrant twist. Fill with chocolate chips or fruit preserves before shaping to create a delightful surprise in every bite, perfect for dessert or a sweet breakfast.
- Savory Stuffed Buns: Incorporate fillings like seasoned ground meat, cheese, or sautéed vegetables for a hearty option that can serve as a main dish, providing a satisfying meal for any time of day.
- Herb-Infused Buns: Mix in dried herbs such as rosemary or thyme into the dough for a fragrant, savory flavor that pairs beautifully with dinner, elevating your meal to gourmet status.
- Gluten-Free Option: Substitute all-purpose flour with a gluten-free blend that includes xanthan gum for elasticity. Ensure all other ingredients, including yeast, are gluten-free to avoid cross-contamination, making these buns accessible to all.
Magic Buns
Magic Buns are the epitome of comfort food, enveloping you in their pillowy softness and inviting aromas. These delightful homemade buns can be adapted for any meal, whether as fluffy dinner rolls, sweet breakfast treats, or savory st■ options.
Ingredients
- 4 cups all-purpose flour, preferably sifted
- 1/4 cup granulated sugar
- 1 packet (2 1/4 teaspoons) active dry yeast
- 1 teaspoon salt
- 1 cup whole milk, warmed (about 110°F)
- 1/2 cup unsalted butter, melted
- 2 large eggs
- 1 egg, beaten (for egg wash)
- Sesame seeds or poppy seeds (for garnish)
Directions
In a large mixing bowl, combine the warm milk and sugar. Sprinkle the yeast over the top and let it sit for about 5-10 minutes, until foamy.
Add the melted butter and eggs to the yeast mixture. Stir until well combined.
In a separate bowl, whisk together the flour and salt. Gradually add the dry ingredients to the wet mixture, stirring until a soft dough forms.
Transfer the dough to a floured surface. Knead for about 8-10 minutes until the dough is smooth and elastic.
Shape the dough into a ball and place it in a greased bowl. Cover with a clean kitchen towel and let it rise in a warm place for about 1 to 1.5 hours, or until doubled in size.
Once risen, punch down the dough gently to release the excess air. Turn it out onto a floured surface. Divide the dough into 12 equal pieces.
Shape each piece into a smooth ball and place the balls on a greased baking sheet.
Cover the shaped buns with the towel again and let them rise for another 30-45 minutes until puffy.
Preheat your oven to 375°F (190°C) during the last 15 minutes of the rising time.
If desired, brush the tops of the buns with the beaten egg and sprinkle with sesame or poppy seeds.
Bake in the preheated oven for 15-20 minutes, until golden brown and the buns sound hollow when tapped on the bottom.
Remove from the oven and let cool on a wire rack.
Recipe Reviews
- ★★★★★
Excellent recipe!
Leave a Reply
Your email address will not be published. Required fields are marked *


Excellent recipe!